About This Site
Daily Musings
News
News Archive
Site Resources
Concept Art
Bungie Weekly Updates
Interviews
Movies
Music
Miscellaneous
Mailbag
HBO PAL
Game Fun
The Halo Story
Tips and Tricks
Fan Creations
Wallpaper
Misc. Art
Fan Fiction
Comics
Logos
Banners
Press Coverage
Halo Reviews
Halo 2 Previews
Press Scans
Community
HBO Forum
Clan HBO Forum
ARG Forum
Links
Admin
Submissions
Uploads
Contact
RSS 2.0
![]()
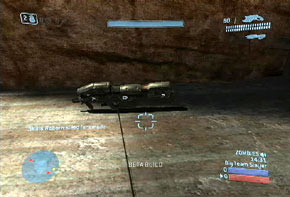
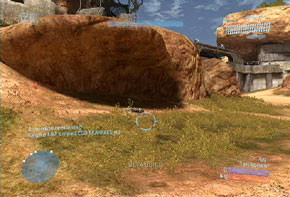
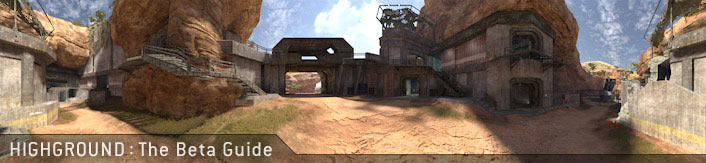 Description: A relic of older conflicts, this base was reactivated after the New Mombasa Slipspace Event. An ancient and abandoned beachhead against earlier and simpler enemies, its hasty requisition means a strange mix of crumbling bulwarks and high-tech military equipment. Just like Zanzibar, it consists of a beach, where the attacking team spawns, and a massive, yet capturable fort, where the defending team, and their flag spawns. There are several ways of getting into the base besides the enormous gate and paths through the flood wall. Bungie has included a series of several tunnels through the bottom, which the player may use for a stealthy advance. The Energy Sword is said to spawn here. 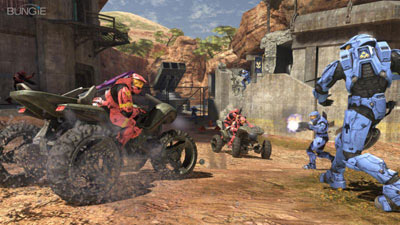 Between the teams rests a large indestructible wall. This wall has a gate,
which is similar to the one found on Zanzibar. The gate can be opened from the inside of the wall on the left side, or
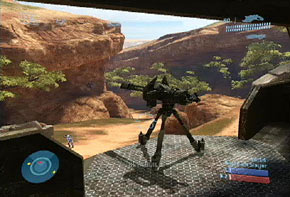
destroyed by heavy weapons. There is a Machinegun Turret mounted at the top of the gate, which is used primarily by the
defending team to ward off attackers. A portable gravity lift rests at the entrance to the left cave, which can be used to
propel the user(s) over the wall. Between the teams rests a large indestructible wall. This wall has a gate,
which is similar to the one found on Zanzibar. The gate can be opened from the inside of the wall on the left side, or
destroyed by heavy weapons. There is a Machinegun Turret mounted at the top of the gate, which is used primarily by the
defending team to ward off attackers. A portable gravity lift rests at the entrance to the left cave, which can be used to
propel the user(s) over the wall.
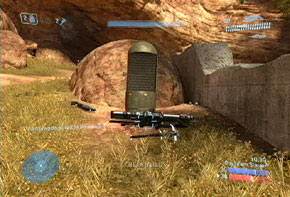
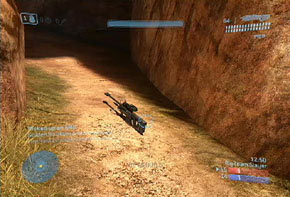
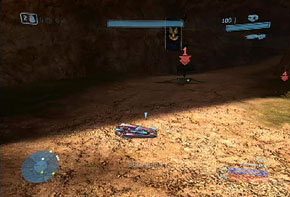
The Sniper Rifle is mostly in range for the attacking team, as it spawns on the beach, along with the Warthog. There is a small camoflauged tower on the left side of the where the Spartan Laser spawns for the defending team. This tower is somewhat vulnerable however, as there are some fusion cores stacked on one side of it. Three Mongooses are the current vehicle set within the base to counter the attacking Warthog. There is an artillery weapon to the rear of the defending base. In descriptions of this weapon, it is described as either a large mortar or a SAM (Surface-to-Air-Missile) site, and presumably fires devastating missiles upon the attackers. However, it is unusable and inactive, at least in the Beta.
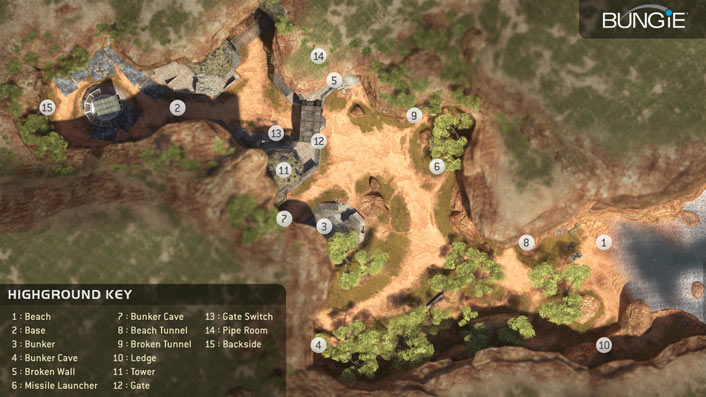 FFA Strategies • The Power weapons on this map include the Spartan Laser, Sniper Rifle, and Rocket Launcher. The Spartan Laser is located at the Tower which is point 11. The Sniper Rifle is located at the beach at point 1. The Rocket Launcher spawns at Bunker Cave at point 4. All these these weapons are priority weapons in a non-team game because heavy weapons win hands down against the default starter Assault Rifle. However for the sniper rifle it is best to only use it when staying down on the beach area because trying to take it through the gate can often be a suicide manuever without a good secondary weapon. • The Equipment on this map includes Bubble Shield, Power Drainer, and Portable Gravity Lift. The Bubble Shield is located at the middle of the map by the Gate and rocks near point 12. The Power Drainer is located at the Gate Switch at point 13. The Portable Grav Lift spawns in the middle right side from the offense base (Bunker Cave), or the middle left side for the defense base, near the Spartan Laser spawn (Tower). • When Spawning at the lower beach area it is best to take the canyon side routes to get to the wall as going down the middle exposes you to all sorts of fire from the machinegun turret to a sniper on the beach. Using what cover this map has to offer is essential for traversing the map in a FFA situation. • Controlling the mounted turret for any extended period of time is unwise in a FFA game due to the possibility of getting meleed in the back or just shot and killed from someone coming over across the wall. • As the name suggests the High Ground in this level is the most well defended and easily defended area of the map and subsequently this is the area that most people head to equivalent to the tower on Lockout from Halo 2. Holding this area by yourself for a few moments can result in multiple kills as other people come up trying to shift control of this area. • Once inside the base on High Ground you have to be alot more careful going around corners and looking at multiple levels of the structures for enemies as the multilevel structures littered with objects to hide behind can conceal a waiting enemy. On the beach side which is more tunnels and open area it is good just to keep using cover for concealment and moving from area to area while taking down enemies on the way. Staying stationary on the beach side of the map isn't recommended because there are no easily defendable positions as in the base so it is best to keep moving when in this area. • The Best all around weapon for this map is the Battle Rifle or Plasma Rifle/Plasma Pistol combo because both have a medium range effectivness that is unmatched on this mid-sized map. • High Ground has a lot of trees and they have more uses than simple aesthetic value. The tree near the shotty can provide access to the ledge overlooking the sniper rifle. Although tricky, the tree near the rocket launcher can provide access to a very narrow ledge above. There is alot of exploration yet to be done so there might be other areas as well. Also on High Ground, you can get on the canopy above the spartan laser. On the ledge, you will see a break in the canopy accompanied by a Y shaped post. You can crouch jump onto this post and then jump again to get atop the canopy. If you don't jump as soon as you hit the Y shaped post, you'll fall back down so be quick about it. On the roof of the computer / flag building, you can grenade jump onto the canopy above. I have found alot of places so far that you can grenade jump to so explore everything. - John Anderson Team Strategies 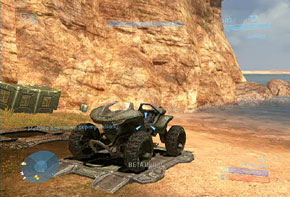 • When your team spawns on the beach the
complement of mongooses are excellent for transporting troops fast up to the base in objective games but other than
transporting these vehicles should not be used for assaulting the actual base. Once in range of the base in a secure location
the mongoose should be dismounted and should be continued on foot. To really think ahead hiding the mongoose in the direction
facing back to your base so you or someone else could jump on with the flag/bomb in hand and drive it quickly back to the
base. • When your team spawns on the beach the
complement of mongooses are excellent for transporting troops fast up to the base in objective games but other than
transporting these vehicles should not be used for assaulting the actual base. Once in range of the base in a secure location
the mongoose should be dismounted and should be continued on foot. To really think ahead hiding the mongoose in the direction
facing back to your base so you or someone else could jump on with the flag/bomb in hand and drive it quickly back to the
base.• One of the most classic, and easily executed, but still stunning when properly executed moves on High Ground is the classic Pincer movement. On High Ground due to the bridge being the primary point in which the enemy stops a assault on the base if the assaulting team breaks up into two segments it is possible to attack all the forces on the bridge from both sides by going up to from the tower and the broken wall. • On High Ground one of the more difficult and advanced manuevers a team can perform is a flanking movement. Flanking involves secretly getting behind the enemy to attack them from the back. Usually this technique is very hard to near impossible for more than 1 or 2 people at the most to pull off but combined with a good destraction like a frontal assault a flanking manuever can work fairly well in clearing the bridge area and the base. However due to the respawning of the enemy near the base it is possible to be outflanked. 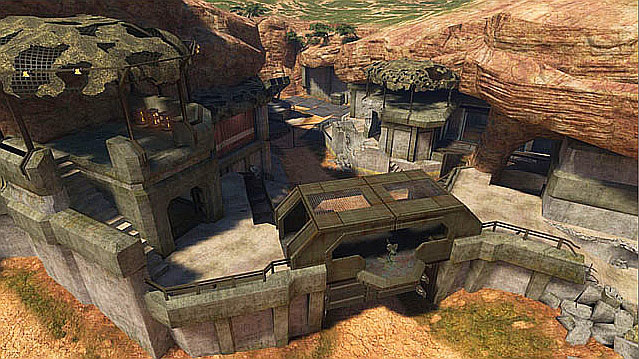 • In defending the base the best position to attack players on foot coming towards the gate is to stand on top of the platform up the stairs and aim down at the area in front of the wall. This will give you a expansive few of the area and a good vantage point to see any oncoming attack. The drawback to this position is that it leaves you wide open to sniper attacks since the sniper spawns on the beach. • Inside the base itself since the walls are all multilevel platforms which are part of the base structure the courtyard in the middle of the base can be a dangerous place and a high intensity fighting ground. It is best to get the strategic advantage of height in this area to pick enemies off. • The Bunker has many twists and turns and doorways and stairs so to be sure not to be caught off guard by any enemies it is best always to keep a few grenades handy in this area to throw around the corner if you suspect a enemy to be hiding in waiting. • The Pipe Room is a covert way into the base. Players assaulting from the beach will find the Broken Wall leading which reveals an exposed pipe. Silence has a price, though. Players have to crouch through the pipe, so while they won't appear on motion tracking, they will be traveling considerably slower. • Aside from the hatch and the stairs, there is a third and much more inventive way for players to get over the rampart-setting a Gravlift on the ground right in front of the wall will allow soldiers to launch themselves into the air and clear the wall. Expert Mongoose riders will also want to give this a try while on a vehicle. • When spawning on the outside of the base, remember to use the transport on the left side of the base. This is a great spot to pick players off. If anyone tries to come up, there are spike grenades that spawn there, so just throw them on the corner of the stairs. Keeping that middle bridge under control by your team is vital as you can do serious damage especially in Team Slayer in terms of containing them, and them forcing them to spawn outside of the base. At this point, keep hold of that transport and the left side stairs. The only threat by then would be from the sniper. • Use the trees for good coverage. Not only staying behind it, but you can get on top of the branches. It is very useful especially in territories when guarding a teammate while they get territory number 1. It is also a dangerous spot to snipe as often times, they won't notice where you are. Weapons Locations
|