
 Trip Mine 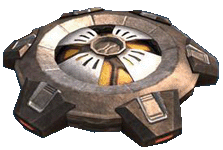 A simple proximity mine that reacts to pressure or movement. It has a slight magnetic impulse that will attach it to vehicles, turning them into deadly traps, or it can be placed on the ground to take care of careless interlopers. The mine has two states - inactive and active - learning to see and hear the difference can be a matter of life or death. Deploying it automatically sets its status to "active" and therefore deadly. It can also be planted and activated at a distance by shooting or otherwise destroying it. A simple proximity mine that reacts to pressure or movement. It has a slight magnetic impulse that will attach it to vehicles, turning them into deadly traps, or it can be placed on the ground to take care of careless interlopers. The mine has two states - inactive and active - learning to see and hear the difference can be a matter of life or death. Deploying it automatically sets its status to "active" and therefore deadly. It can also be planted and activated at a distance by shooting or otherwise destroying it.Due to the trip mines properties it can be a very interesting way to take out a opponent. Its most obvious use is to throw it down right in front of a charging vehicle which would destroy it and give you the kill. Another less common but more humorous use of the trip mine is to place it on the landing place of a mancannon. Since the mancannon always lands players in the same spot placing a trip mine in that spot will result in a kill. Also another use of the trip mine is to set a trap for a opponent. A trip mine can either be placed right in front of a vehicle before a player gets in it so when they start the vehicle it blows up in front of them. Another similar use is to place it in a entrance way with a low entrance so it is harder to jump over and if a player lands on it or tries to just walk through it explodes killing them. Gravity Lift  A simply gravity field device that emits a column of directed anti-gravity force - a Covenant technology whose physics may be borrowed from Forerunner scavenging. This device is a simple but effective means of giving materiel or troops a quick vertical lift, occasionally out of harm's way. An example of its use would be to drop it outside the wall on High Ground, vault over the wall and activate the (hopefully) undefended gate switch. Clever defenders will be more than ready for this, however. Remember that vehicles, as well as persons, can be affected by this device. A simply gravity field device that emits a column of directed anti-gravity force - a Covenant technology whose physics may be borrowed from Forerunner scavenging. This device is a simple but effective means of giving materiel or troops a quick vertical lift, occasionally out of harm's way. An example of its use would be to drop it outside the wall on High Ground, vault over the wall and activate the (hopefully) undefended gate switch. Clever defenders will be more than ready for this, however. Remember that vehicles, as well as persons, can be affected by this device.The Gravity lift has alot of potential to vault over objects or to prop yourself up to areas unavailable usually to get a good vantage point to attack the enemy. One example of this is to use a gravity lift to get on top of a rock with the sniper rifle and then sniping from the rock. Another use for the defenders of a base is to place a gravity lift at a chokepoint such as on High Ground and vehicles trying to pass through the chokepoint will get caught and lifted by the gravity lift. Overall this piece of equipment is more useful just to get from place to place and to get to inaccessible places. The grav-lift shoots you up into the air to gain access to normally out-of-reach places, but its placement is crucial. Typically, you should drop the grav-lift near a high-up weapon placement more easily accessible to the enemy's spawn location. For example, the Spartan laser on Higher Ground can be reached easily by the group that spawns behind the wall, but with the grav-lift, the group down below can make a run for it just as quickly. Bubble Shield  An instant field-based energy shield that prevents the rapid transition of energy or percussion weapon rounds. Its spherical shape is large enough to protect a small group, but users, or more importantly, enemy troops, can pass through it on foot or in vehicles. It contains as well as deflects fire and explosions, so be careful what you do while inside the confines of a bubble shield. An instant field-based energy shield that prevents the rapid transition of energy or percussion weapon rounds. Its spherical shape is large enough to protect a small group, but users, or more importantly, enemy troops, can pass through it on foot or in vehicles. It contains as well as deflects fire and explosions, so be careful what you do while inside the confines of a bubble shield.The Bubble shield is one of the more versatile and useful pieces of equipment. Deploying a bubble shield at the right moment can give you the time needed to recharge your shields. Uses of the Bubble Shield vary but the most common and obvious is to hide underneath it and pop out to attack other players. A more advanced variation of this could be to attack a player and launch the bubble shield so if they throw a grenade at it it will bounce off and back at them. Especially if its a spiker grenade it will exlode perpendicular to the bubble shield which would be outwards in the direction it was thrown. Bubble shields are very useful because they provide a semi-permeable wall in which anyone can travel through but if your on the inside you can only get hurt by people inside with you. Consequently if a enemy manages to step into your bubble shield chances are they'll drop a grenade because it will kill anything inside the shield. Another clever manuver is that on a incline the shield rolls so you can walk under the cover of the shield. When using the bubble shield one of the main things to look out for is getting splattered by vehicles. Since only bullets and grenades are stopped by the shield a vehicle can come through and splatter anyone inside. Using the bubble shield to give you downtime to repair your shields is a good use for the equipment but destroying it afterwards is a wise move less it provide shelter for a enemy. The Bubble shields is one of the most important pieces of equipment in any king of the hill match. Launching a bubble shield in the middle of the hill can allow you to stay in the hill and be impenetrable to anyone on the outside. To take the hill a enemy has to actually come into the shield which if you have a short range weapon like the shotgun can be a deadly encounter. Power Drain 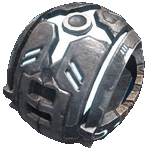 A Short-range magnetic induction effect causes disastrous failure of powered field systems within a set radius. Designed primarily to interfere with common varieties of field-based shielding and power generation. It also has a damaging effect on biological systems and can wound or kill most bipeds. Basically, if you see it, or even hear it, get away quick. A Short-range magnetic induction effect causes disastrous failure of powered field systems within a set radius. Designed primarily to interfere with common varieties of field-based shielding and power generation. It also has a damaging effect on biological systems and can wound or kill most bipeds. Basically, if you see it, or even hear it, get away quick.The power drainer is a very effective item both as a weapon and as a defense. If used in the area with a cluster of enemies it drops all the enemy shields which would allow for a grenade to be used for easy kills. When used against any enemies it causes panic at the sudden lose of shields and can force a enemy to withdraw from a position even if they have fortified it with multiple defenses. The power drainer can be used as a great weapon if set in a enemy base in a objective game. It can clear the base of all defenders are make it easy to steal the flag in a CTF game or once the Drainers effect disappears to quickly plant a bomb in a assault game. The only drawback to the Power Drainer is that it is indiscriminate in who's shields it lowers and if the player who dropped the power drainer stays in its radius to long it will drop their shields. If a enemy is within the radius of the drainer for too long, the enemy will actually die. The power drainer is a perfect anti-bubble shield weapon. The power drainer will pass through the bubble shield as well as blast doors. If someone just erected a bubble shield..., toss an energy drainer inside the bubble and they'll come out in a hurry. On maps like snowbound, the energy drainer is an effective means of flushing out base campers. - John Anderson The power-drainer rips off the enemy's energy shields and is devastating when properly used. There may be no better application for this worthy addition to the Halo arsenal than in Team Crazy King matches. Drop a power-drainer on a tightly-clustered enemy crew huddling inside the hill, and you'll transfer ownership in a hurry. Radar Jammer 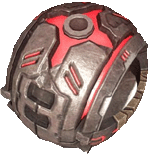 The Radar Jammer is an equipment item that scrambles nearby players' motion sensors and HUDs when deployed, it also makes their screen flicker and flash as if they're taking damage. While it can create chaos for enemies, it has the same effect on teammates. The Radar Jammer is an equipment item that scrambles nearby players' motion sensors and HUDs when deployed, it also makes their screen flicker and flash as if they're taking damage. While it can create chaos for enemies, it has the same effect on teammates.This weapon is devastatingly effective when assaulting a base in CTF or similar gametypes as the enemies camping in the base have no idea how many enemies are attacking and where they are coming from. If applicable its best to drop the radar jammer into the base from above and then have a plan beforehand to take the flag or other objective because the jammer works on you just as well as everyone else. If you use the jammer with a disorganized team the effect can be just as bad on your team as the opposing team. Regenerator 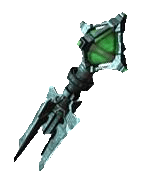 The generator is a useful piece of equipment that when activated restores the health of anyone within the vicinity of its green glow. Of course like other pieces of equipment the regenerator is a double edged sword because not only will it heal you and your allies but it will also heal any enemies within its glow. Also if you try and use it in the thick of combat you will find most of the time your shields will go down from enemy attack faster than the regenerator can restore them. Its best to use this equipment when you've suffered a hit from an enemies ranged weaponry and you can duck away in a safe spot to quickly restore your shields. In combating the regenerator the best weapon to use is the brute shot because it deals massive amounts of damage on a per grenade basis and it can easily kill anyone within the regenerator's field or destroy the regenerator depending on which you target. Also the regenerator provides no protection from headshots or other instant kill methods. The generator is a useful piece of equipment that when activated restores the health of anyone within the vicinity of its green glow. Of course like other pieces of equipment the regenerator is a double edged sword because not only will it heal you and your allies but it will also heal any enemies within its glow. Also if you try and use it in the thick of combat you will find most of the time your shields will go down from enemy attack faster than the regenerator can restore them. Its best to use this equipment when you've suffered a hit from an enemies ranged weaponry and you can duck away in a safe spot to quickly restore your shields. In combating the regenerator the best weapon to use is the brute shot because it deals massive amounts of damage on a per grenade basis and it can easily kill anyone within the regenerator's field or destroy the regenerator depending on which you target. Also the regenerator provides no protection from headshots or other instant kill methods.When employing a regenerator be sure to drop it in a location that you can take advantage of it say like around the corn from where you plan to engage enemies or even at the landing point of a mancannon if there is a battle happening on the other end. Flare 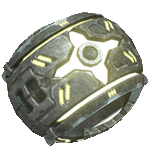 The flare is more of a nuisance than anything else. Unless your looking directly at it or its dropped right in front of you, you'll only be partially blinded and its usually not to a level that will greatly effect fighting ability. In multiplayer the flare is best used in conjunction with the radar jammer because the two together disrupt the enemies sense of sight and ability to use the radar to fight. If your team can coordinate the use of these two at the same time you can easily win most objective games where you have to infiltrate the enemies base. In the campaign the flare is seemingly useless because enemies just "know" where you are and don't rely on sight to see you. When using the flare you can be effected by its powerful glow so its best to throw it around a corner or drop it into the enemies base so you won't be effected by its blinding power and you will have a edge over your opponents, if only for a split second. The flare is more of a nuisance than anything else. Unless your looking directly at it or its dropped right in front of you, you'll only be partially blinded and its usually not to a level that will greatly effect fighting ability. In multiplayer the flare is best used in conjunction with the radar jammer because the two together disrupt the enemies sense of sight and ability to use the radar to fight. If your team can coordinate the use of these two at the same time you can easily win most objective games where you have to infiltrate the enemies base. In the campaign the flare is seemingly useless because enemies just "know" where you are and don't rely on sight to see you. When using the flare you can be effected by its powerful glow so its best to throw it around a corner or drop it into the enemies base so you won't be effected by its blinding power and you will have a edge over your opponents, if only for a split second.
Invincibility 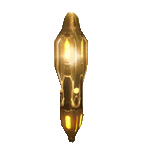 Invincibility gives to its user a brief period of invulnerability, which is functionally and aesthetically similar to Tartarus's energy shield. It is known to be possessed by some or all Brute Chieftains in campaign, giving chieftains a brief period of time where they may chase after the player with the Gravity Hammer unhindered, giving them a significant tactical advantage. It is also present in multiplayer in the form of a custom powerup, although its appearances will be infrequent, since the power-up will be too "cheap" for some players. Invincibility is the kind of power-up that you can use to rush the enemy base and attack them with everything you have for the brief period that the power-up lasts. In multiplayer slayer games on of the best tactics to utilize with this power-up is to run into a cluster of enemies and take down as many of them as you can before the power-up wears off and you may die once that has happened but you will have gotten 6 or 7 kills before it wears off so its a good trade off of kills for deaths. Invincibility gives to its user a brief period of invulnerability, which is functionally and aesthetically similar to Tartarus's energy shield. It is known to be possessed by some or all Brute Chieftains in campaign, giving chieftains a brief period of time where they may chase after the player with the Gravity Hammer unhindered, giving them a significant tactical advantage. It is also present in multiplayer in the form of a custom powerup, although its appearances will be infrequent, since the power-up will be too "cheap" for some players. Invincibility is the kind of power-up that you can use to rush the enemy base and attack them with everything you have for the brief period that the power-up lasts. In multiplayer slayer games on of the best tactics to utilize with this power-up is to run into a cluster of enemies and take down as many of them as you can before the power-up wears off and you may die once that has happened but you will have gotten 6 or 7 kills before it wears off so its a good trade off of kills for deaths.
Invisibility 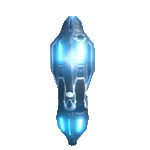 Invisibility is another rare put useful power-up that can change the tide of many situations. In campaign you are more invisible than in multiplayer in a sense because the AI is programed to pretend they can't see you at all whereas in multiplayer the human eye can often pick up your movement even if your suppose to be invisible. In campaign, invisibility is to be cherished when going up against Flood hoards and just slipping past them without even having to fight them. This is especially useful on legendary where the Flood can quickly overwhelm you in a large room with ranged pure forms and combat forms constantly attacking you. The one drawback to this in campaign is that the invisibility always seems to end right at the most inconvenient time so make sure you you don't activate it until you know exactly what your doing and when your doing it or otherwise it will end half way through whatever you are doing and you'll be very vulnerable to attack. In multiplayer invisibility is somewhat diminished in its usefulness because enemies can still see you can close range and even medium range if they have sharp eyes. Also you still appear on the radar whether invisible or not so if you truly want to use this power-up to its full advantage its best to try and remain crouched to avoid being detected by radar and to stay away from enemies until exactly the right moment before you strike. On open maps this is especially true because firing a weapon negates the invisibility and will make your temporarily visible which will offset any advantage gained by being invisible in the first place. Invisibility is another rare put useful power-up that can change the tide of many situations. In campaign you are more invisible than in multiplayer in a sense because the AI is programed to pretend they can't see you at all whereas in multiplayer the human eye can often pick up your movement even if your suppose to be invisible. In campaign, invisibility is to be cherished when going up against Flood hoards and just slipping past them without even having to fight them. This is especially useful on legendary where the Flood can quickly overwhelm you in a large room with ranged pure forms and combat forms constantly attacking you. The one drawback to this in campaign is that the invisibility always seems to end right at the most inconvenient time so make sure you you don't activate it until you know exactly what your doing and when your doing it or otherwise it will end half way through whatever you are doing and you'll be very vulnerable to attack. In multiplayer invisibility is somewhat diminished in its usefulness because enemies can still see you can close range and even medium range if they have sharp eyes. Also you still appear on the radar whether invisible or not so if you truly want to use this power-up to its full advantage its best to try and remain crouched to avoid being detected by radar and to stay away from enemies until exactly the right moment before you strike. On open maps this is especially true because firing a weapon negates the invisibility and will make your temporarily visible which will offset any advantage gained by being invisible in the first place.
Auto Turret  The auto turret is a floating stripped down sentinel beam that fires at anything that gets in front of it. However it is mostly ineffective as a defensive weapon because it can easily be turned by the concussion blast from a grenade or even destroyed from a direct hit. Also for the most part it does not have a high rate of fire and has to be facing directly at your opponent to even engage them. In campaign this weapon is most effective at clearing a room of flood infection forms but just doesn't inflict the damage necessary to take out combat or pure forms. If you come across another piece of equipment it is usually better just to trade the auto turret for it because chances are it will be more effective in combat. The auto turret is a floating stripped down sentinel beam that fires at anything that gets in front of it. However it is mostly ineffective as a defensive weapon because it can easily be turned by the concussion blast from a grenade or even destroyed from a direct hit. Also for the most part it does not have a high rate of fire and has to be facing directly at your opponent to even engage them. In campaign this weapon is most effective at clearing a room of flood infection forms but just doesn't inflict the damage necessary to take out combat or pure forms. If you come across another piece of equipment it is usually better just to trade the auto turret for it because chances are it will be more effective in combat.
Personal Shield 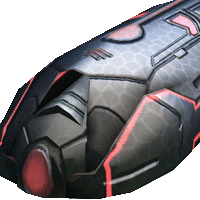 The personal shield is one of the most useful and versatile pieces of equipment that you will come across. Although it can be overloaded any destroyed it absorbs a high amount of damage can can provide a convenient wall when facing enemies. Unlike the bubble shield which is permeable by and solid object whether vehicle or person the personal shield will not allow people or vehicles to pass through it. However vehicles due to shear size can often overload the shield just be running into it, it does slow them down considerably and they usually won't have enough momentum to run you over if your standing directly behind a shield. Of of the great uses for the personal shield is to block off doorways completely in campaign and multiplayer. In campaign the enemy will not be able to get past the shield so they usually wait until its expired and in multiplayer the enemy will have to overload it which is more than enough time to mount a effective defense of the room your in or restore your health bar to continue to fight. The one drawback to this equipment that if you want to prematurely destroy it you have to target the shield generator at the bottom of it and it causes a small explosion when destroyed. The personal shield is one of the most useful and versatile pieces of equipment that you will come across. Although it can be overloaded any destroyed it absorbs a high amount of damage can can provide a convenient wall when facing enemies. Unlike the bubble shield which is permeable by and solid object whether vehicle or person the personal shield will not allow people or vehicles to pass through it. However vehicles due to shear size can often overload the shield just be running into it, it does slow them down considerably and they usually won't have enough momentum to run you over if your standing directly behind a shield. Of of the great uses for the personal shield is to block off doorways completely in campaign and multiplayer. In campaign the enemy will not be able to get past the shield so they usually wait until its expired and in multiplayer the enemy will have to overload it which is more than enough time to mount a effective defense of the room your in or restore your health bar to continue to fight. The one drawback to this equipment that if you want to prematurely destroy it you have to target the shield generator at the bottom of it and it causes a small explosion when destroyed.
|